This will hopefully be the first article of a few covering the building of my new home application server.
I have been toying with the idea on building a new server for home use for a while now. I need something a bit more powerful then B3 to run web applications on. No disrespect for the B3 that is a shiny piece of hardware doing what it’s supposed to very nicely, delivering the best user experience possible, per watt of power consumed. But i think that i have met the limits on what its capable of in some ways. My plan is to demote the B3 to file serving duty and use the new computer running mainly web applications.
So i started gathering data on what was available and this is what i have come up with this far.
Wanting this piece of hardware not eating my electrical bill for lunch i decided to try keeping power consumption somewhat low.
I started choosing CPU and ended up deciding to use the Intel core I3-2120T being a low power I3 with a dual core 2.6GHz Sandy bridge with a max TDP of 35W.
After some reading of tests i decided to go with an Intel DH67CF motherboard since it seems to do best with regards to power consumption and performance. I also had Asus P8H67-I as a strong contender but finally decided for the Intel brand. Both these boards come with 6GHz SATA-III and USB 3.0, hopefully, making sure that i get good IO performance.
The Asus motherboard had two other things not being right for me. It has a Realtek® 8111E ethernet controller which at least previously had bad Linux support. Further more the Deluxe version, the one i could order when looking around, had integrated WIFI which i where uninterested in.
To further keep power consumption low and performance high i opted for a SSD drive. My plan is to only run the Linux OS, web, database and most likely mail server on this machine. All other files such as media etc will be left on the B3 server. Thus i don’t need a lot of space. I choose the 2.5″ OCZ Vertex 3 at 60GB using a similar one in my workstation being happy with it. (According to specs it should use ~3W when in full operation)
As primary memory i just picked up 8GB (2x4GB) of DDR3 from Corsair. This might actually be me my first problem. Opening the packaging i saw a pair of huge heat sinks. These most likely will not fit into the casing i got….
well we just have to wait and see.
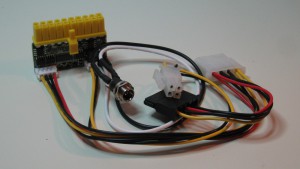
Estimating the power consumption of the above mentioned parts i would guess that it would use ~45W power when exercised a bit. With that in mind i got a 90W DC power supply to give it its DC power i got a no-name 80W brick.
 To house all of the above parts i got a, butt ugly, aluminum casing from Emko
But since this piece should hopefully not be visible on a daily basis the WAF is not the primary concern here 🙂
So what does all these parts cost? I must admit that i did not hunt for the absolute lowest prices on the net. I surely could have got this cheaper than what i did. But i estimate that all parts on the first image cost would be something like 4500 SEK (Swedish “kronor”) or about Eur 480 at current exchange rates.
As a final note i have to show what came in one of the packages from one of the retailers.
I’m not really sure how i should decipher that. Sure its a nice gesture to have something to chew on while assembling the components, or something to comfort one self with when everything goes wrong. Never the less, i think its quite a PR trick 🙂
Well thats all for now. In the next part of this series i will try getting all parts to fit into the minimal casing. As said above i have strong doubts that the memory modules will fit. And when thats done its time for the most interesting part, what software to put into place. There are a few new applications that I’m very interested in trying out.


First!
Eh…
Good luck with the project!
I think that casing could look great with a bit of spray-paint 😉
Hi Daniel,
Good idea to do a paint job. But as you will see in the next article i had some serious setbacks with that case 🙁
Hej, kul projekt.
Skall bli spännande att se vilken mjukvara och services du kommer köra på denna, och hur den snackar med bubban…
Tjena 🙂
Ja, tanken är väl att utforska vad som finns idag. Har ju kommit en del spännande projekt på senare tid. Skall bara få ihop burken då…
Pingback: “WAS” assembly, part one | A blog with a view
Pingback: “WAS” assembly, part two | A blog with a view